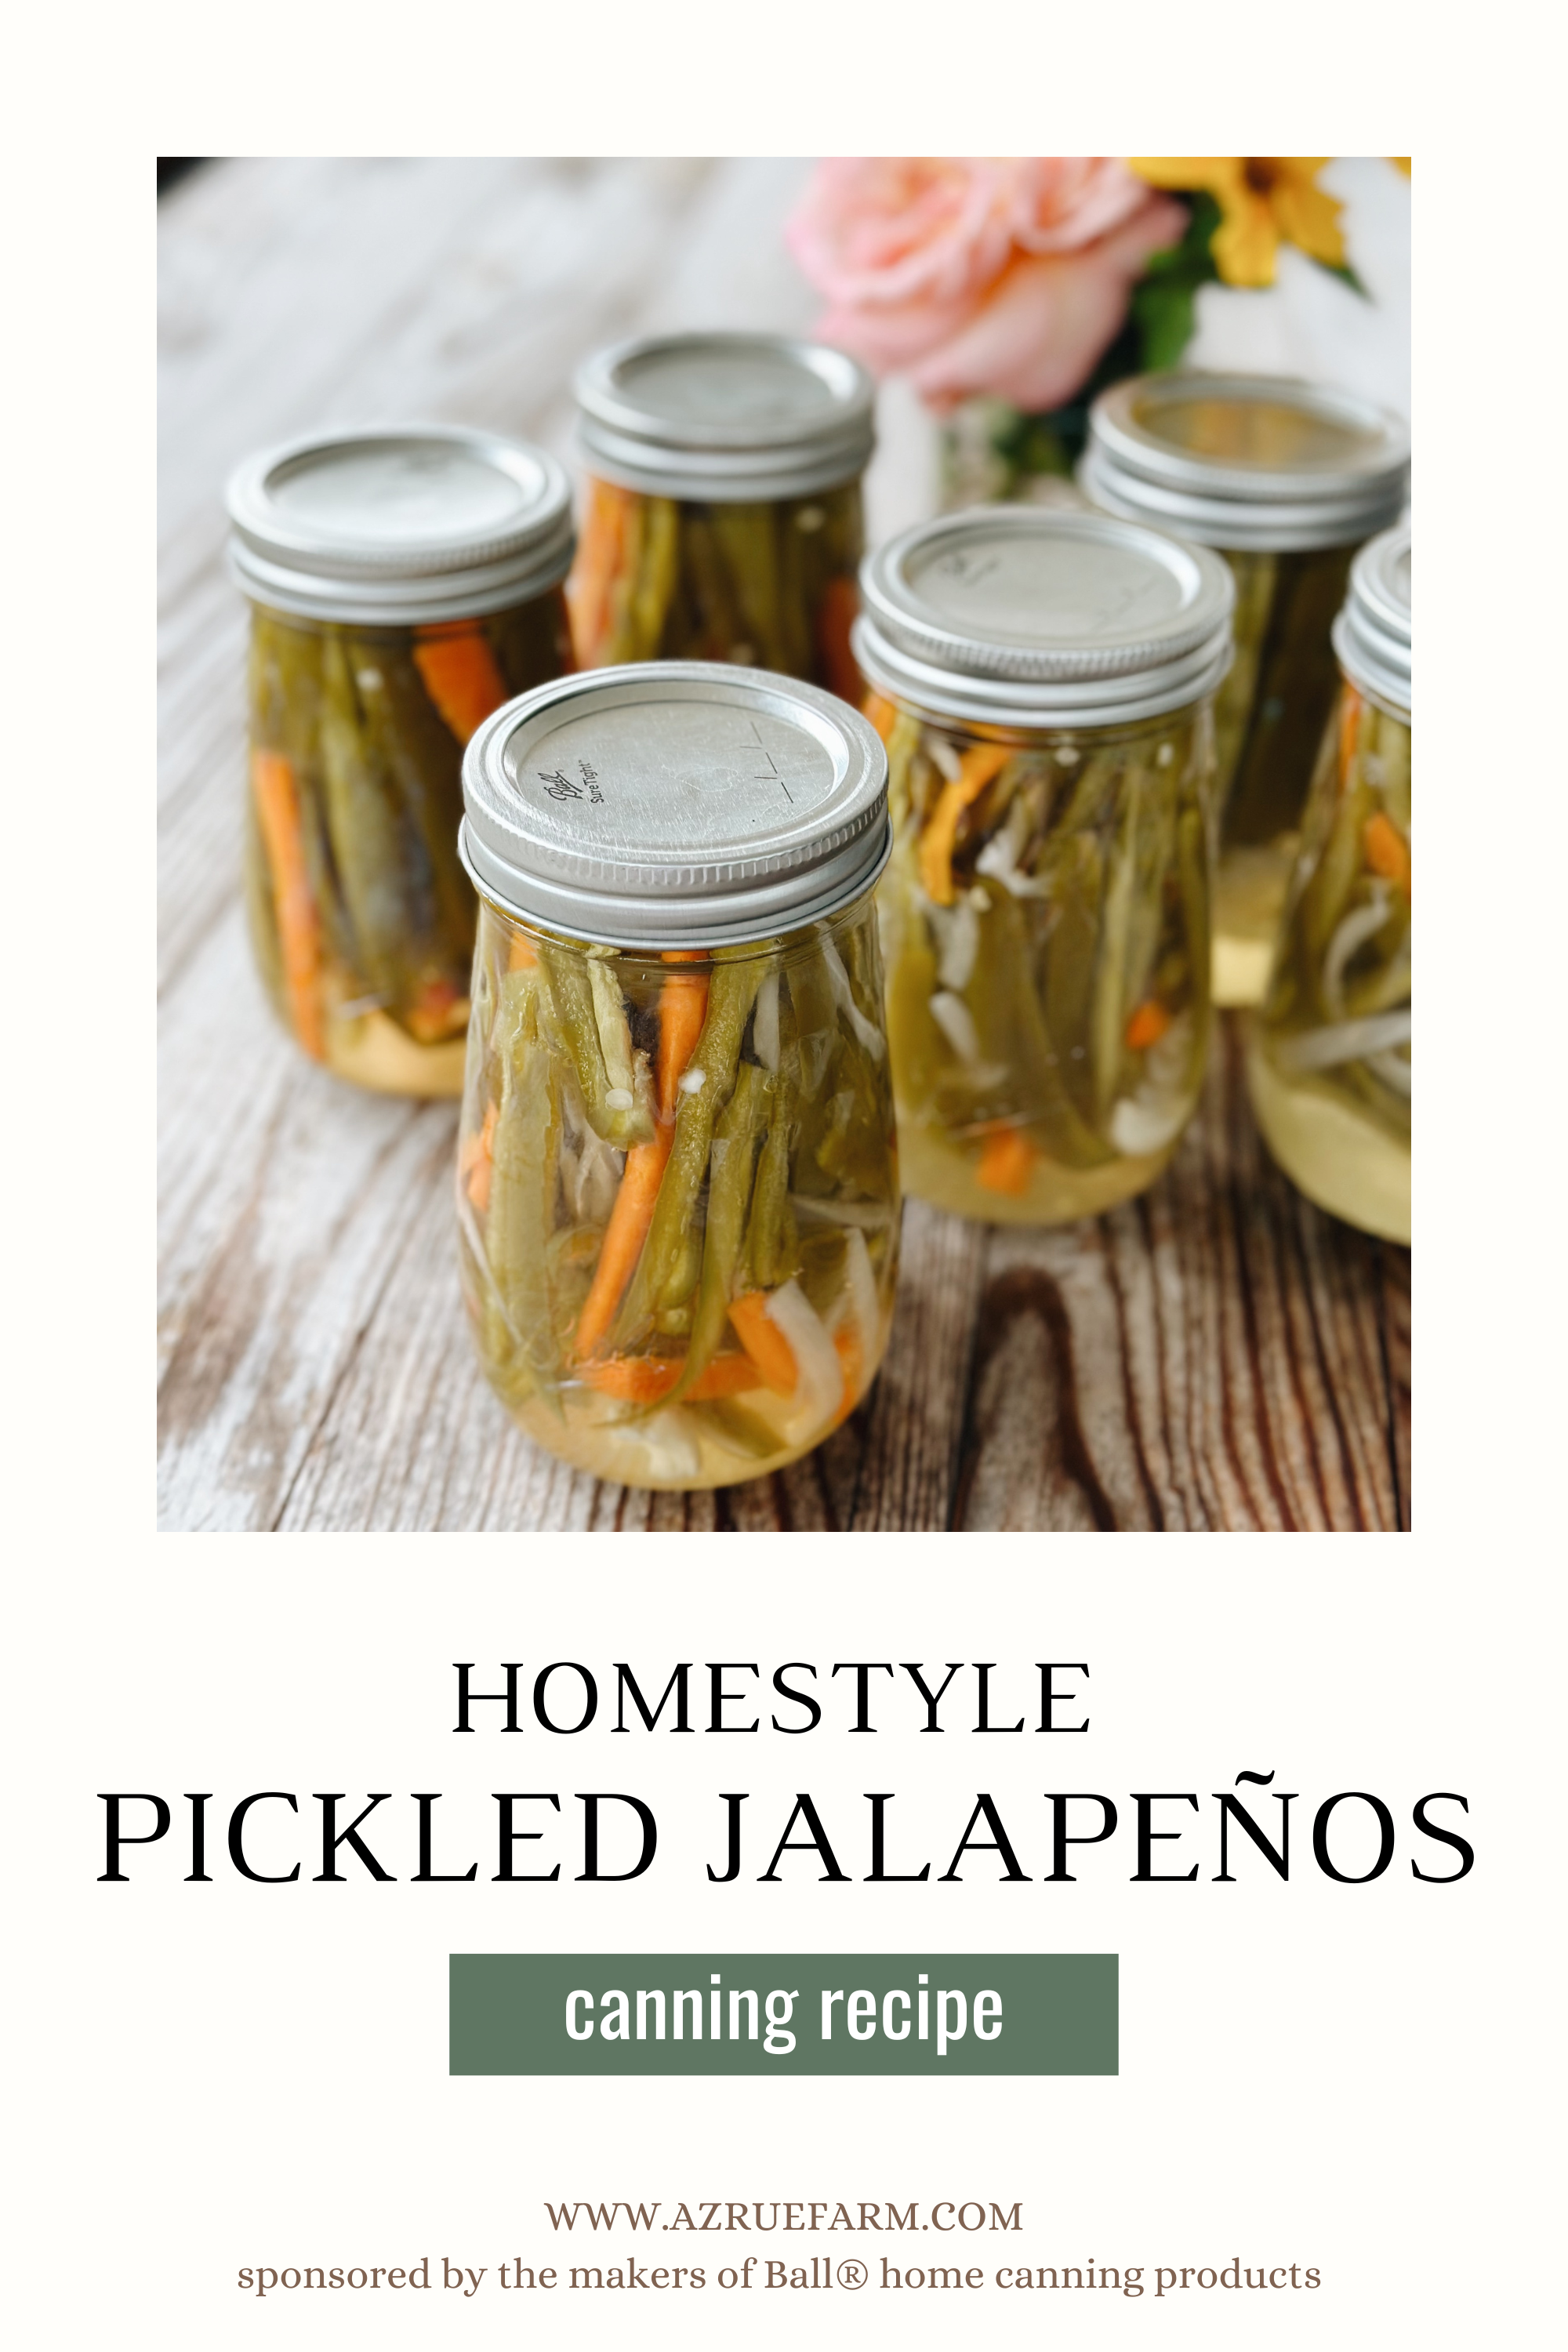
Home-Style Pickled Jalapeños Perfect For A Picnic Or Cookout!
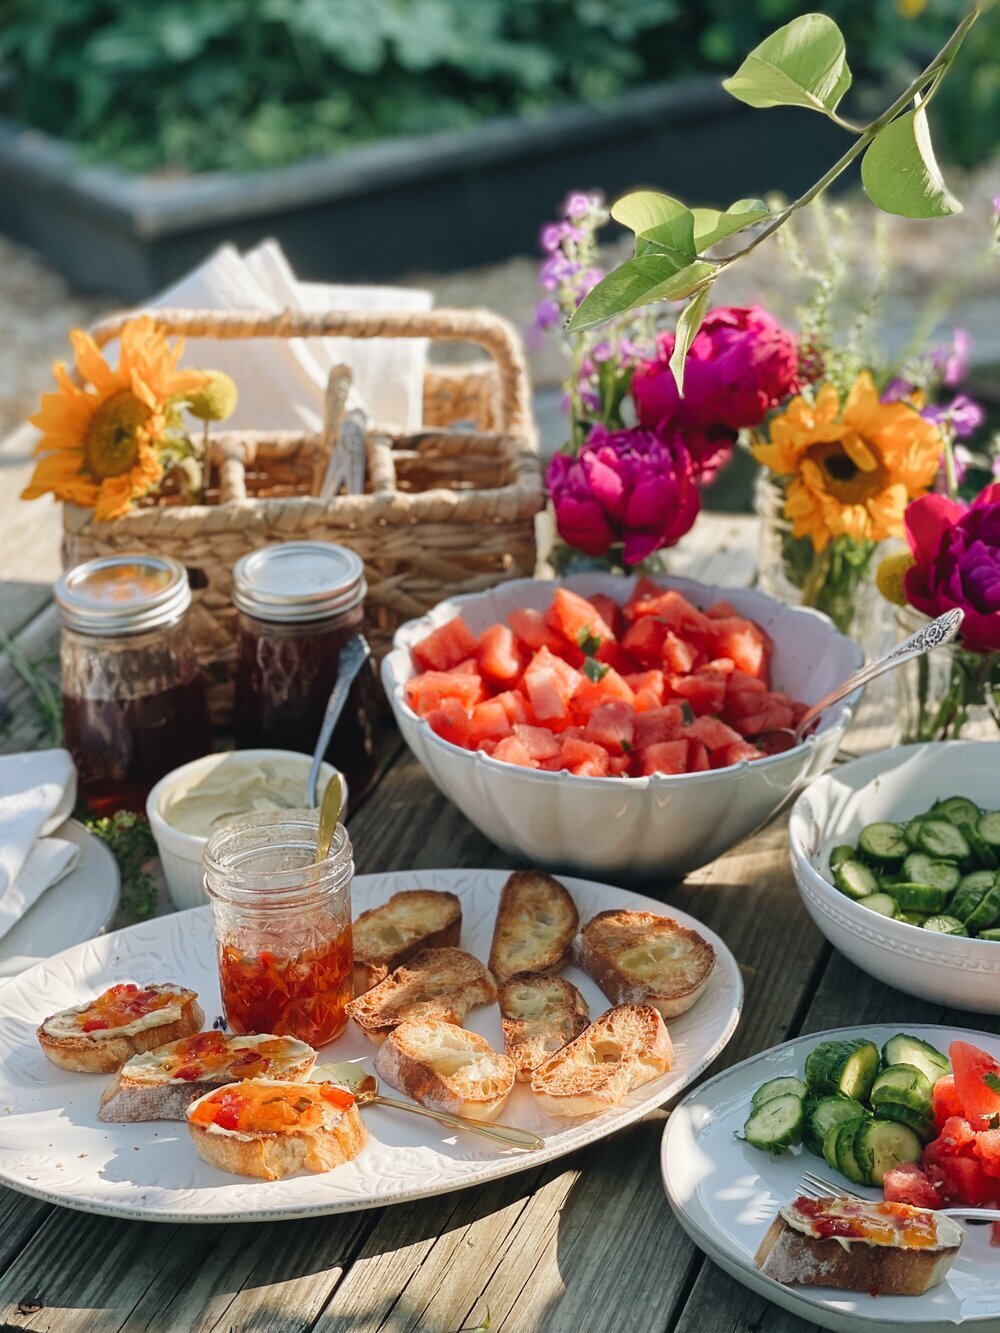
With canning season here and great summer weather waving hello, there is only one thing left to do - outdoor picnics!
Although we don’t get time to have picnics that often, it is something we really enjoy as a family and try to do at least a few times during the spring and summer.
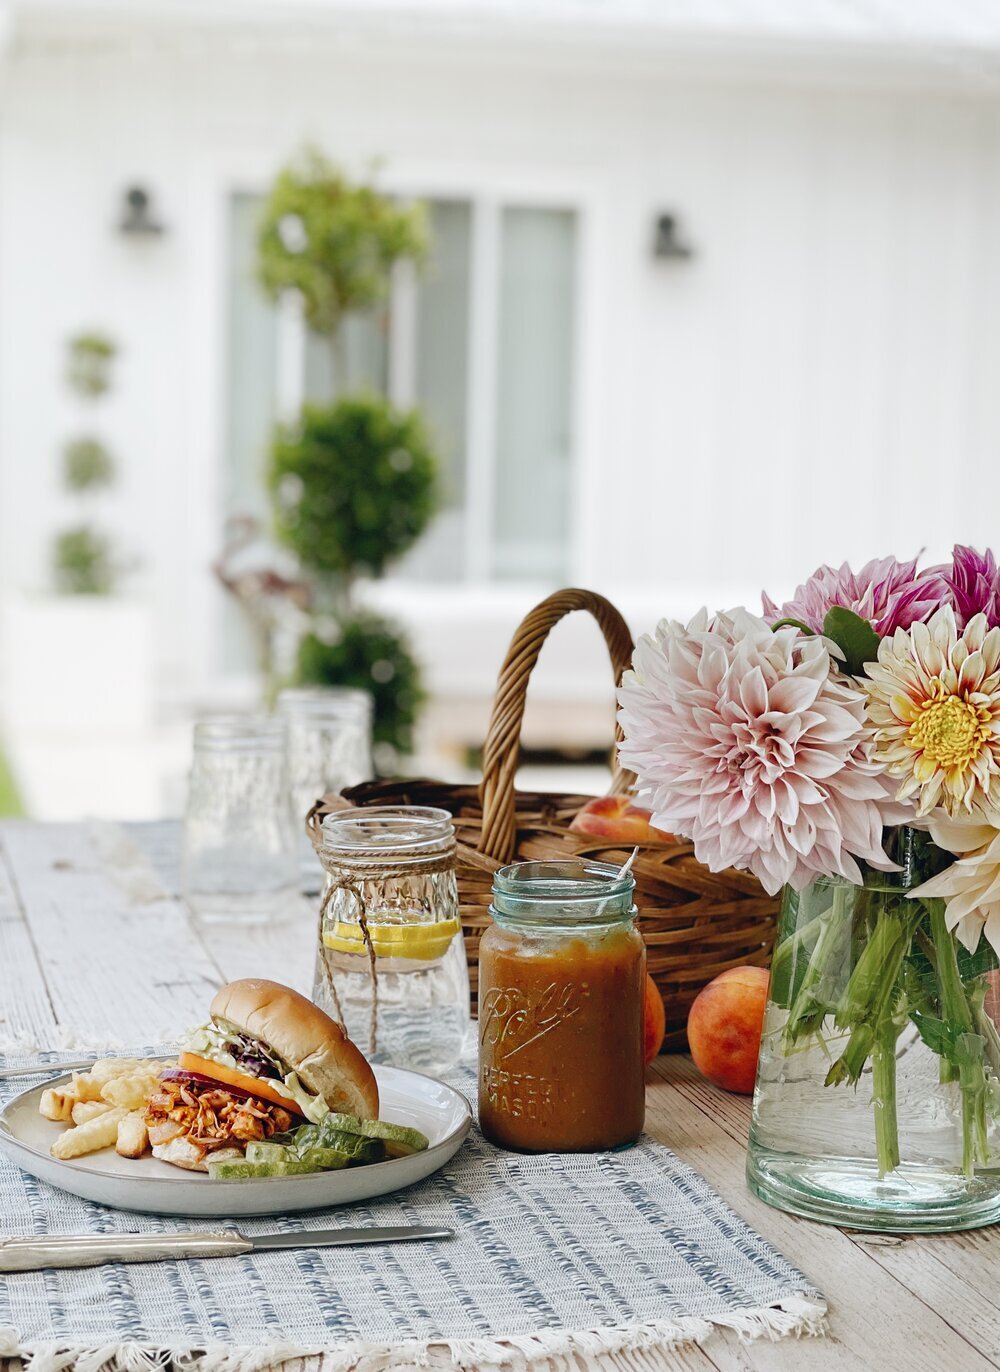
Picnics are the perfect excuse to enjoy all the fun treats, fresh produce, and some of my deliciously canned foods! The excitement is real when you open a jar of canned food and taste it for the first time!
And these Ball® home canning homestyle pickled jalapeños are no exception. They are perfect for picnics or cookout delights!
They are perfect for tacos, nachos, or any favorite sandwich that needs spicing up! I also love just snacking on them straight out of the jar. And that's what you want for a picnic, right? Easy and tasty!
Scroll down to get the recipe!
*This post is sponsored by the makers of Ball® home canning products.

But first, what is meant by“canning season”?
Can you not can throughout the whole year??
Oh yes, you can, friend!
Although you can can any food you want (to an extent), any time during the year, the term “canning season” often refers to April to September (spring and summer) because most of the popular foods to can are in season and in abundance during these months.
The most important thing to remember is to ALWAYS use a tried, tested, and approved recipe!
If you are ready to kick off this “canning season,” try one of Ball® Home Canning’s many delicious, tried, and approved recipes for safe and successful canning every time! I suggest you start by going to their website. They so many delicious recipes and helpful canning tips.
When it comes to doing an outdoor picnic or gathering, think simple. I love to gather at the small table in my garden. Nothing too fancy, but it’s the perfect moment to relax and enjoy delicious food.
READ MORE:
How to can food in 10 easy steps, with a beginner’s recipe
Canning vegetables and fruit - The essentials you need to know plus delicious recipes
Your canning fears, problems, and concerns addressed with easy solutions

Home-Style Pickled Jalapeños recipe
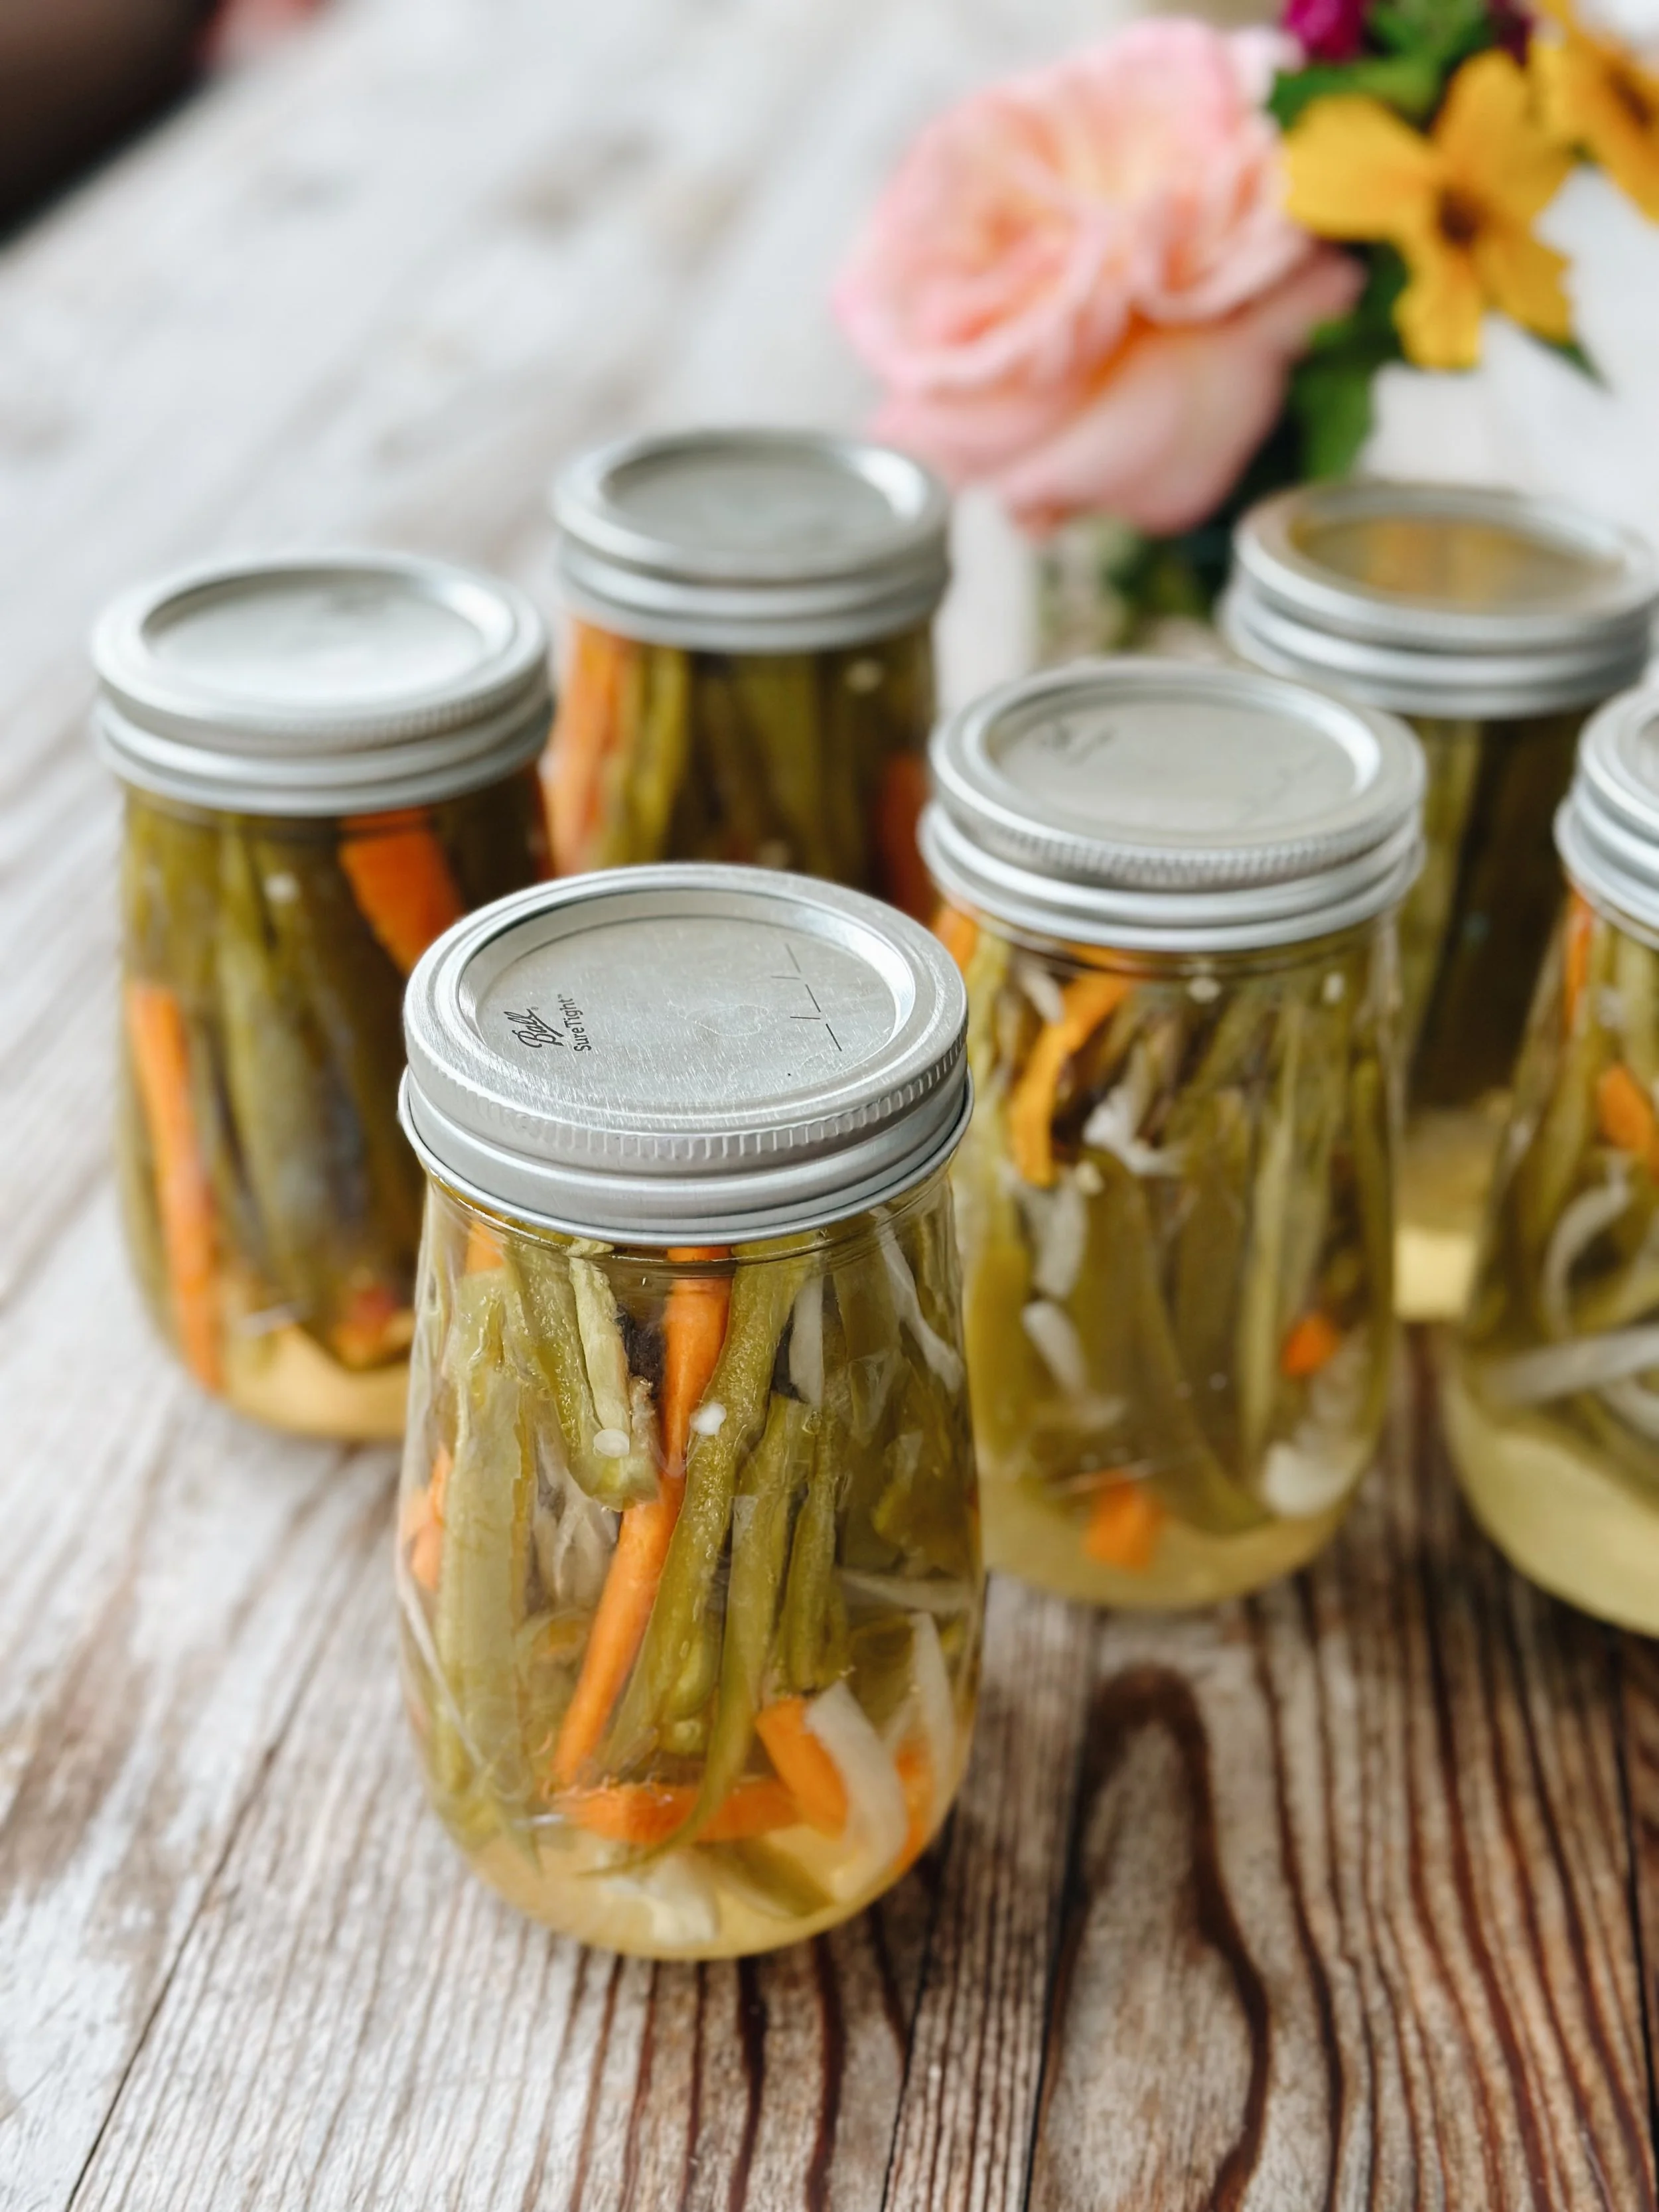
Makes: Makes: About 6 jars (1-PT./500-mL) I used my favorite Ball® Flute Jars. get them HERE
Prep time: 5 minutes
Processing time: 10 minutes
ingredients
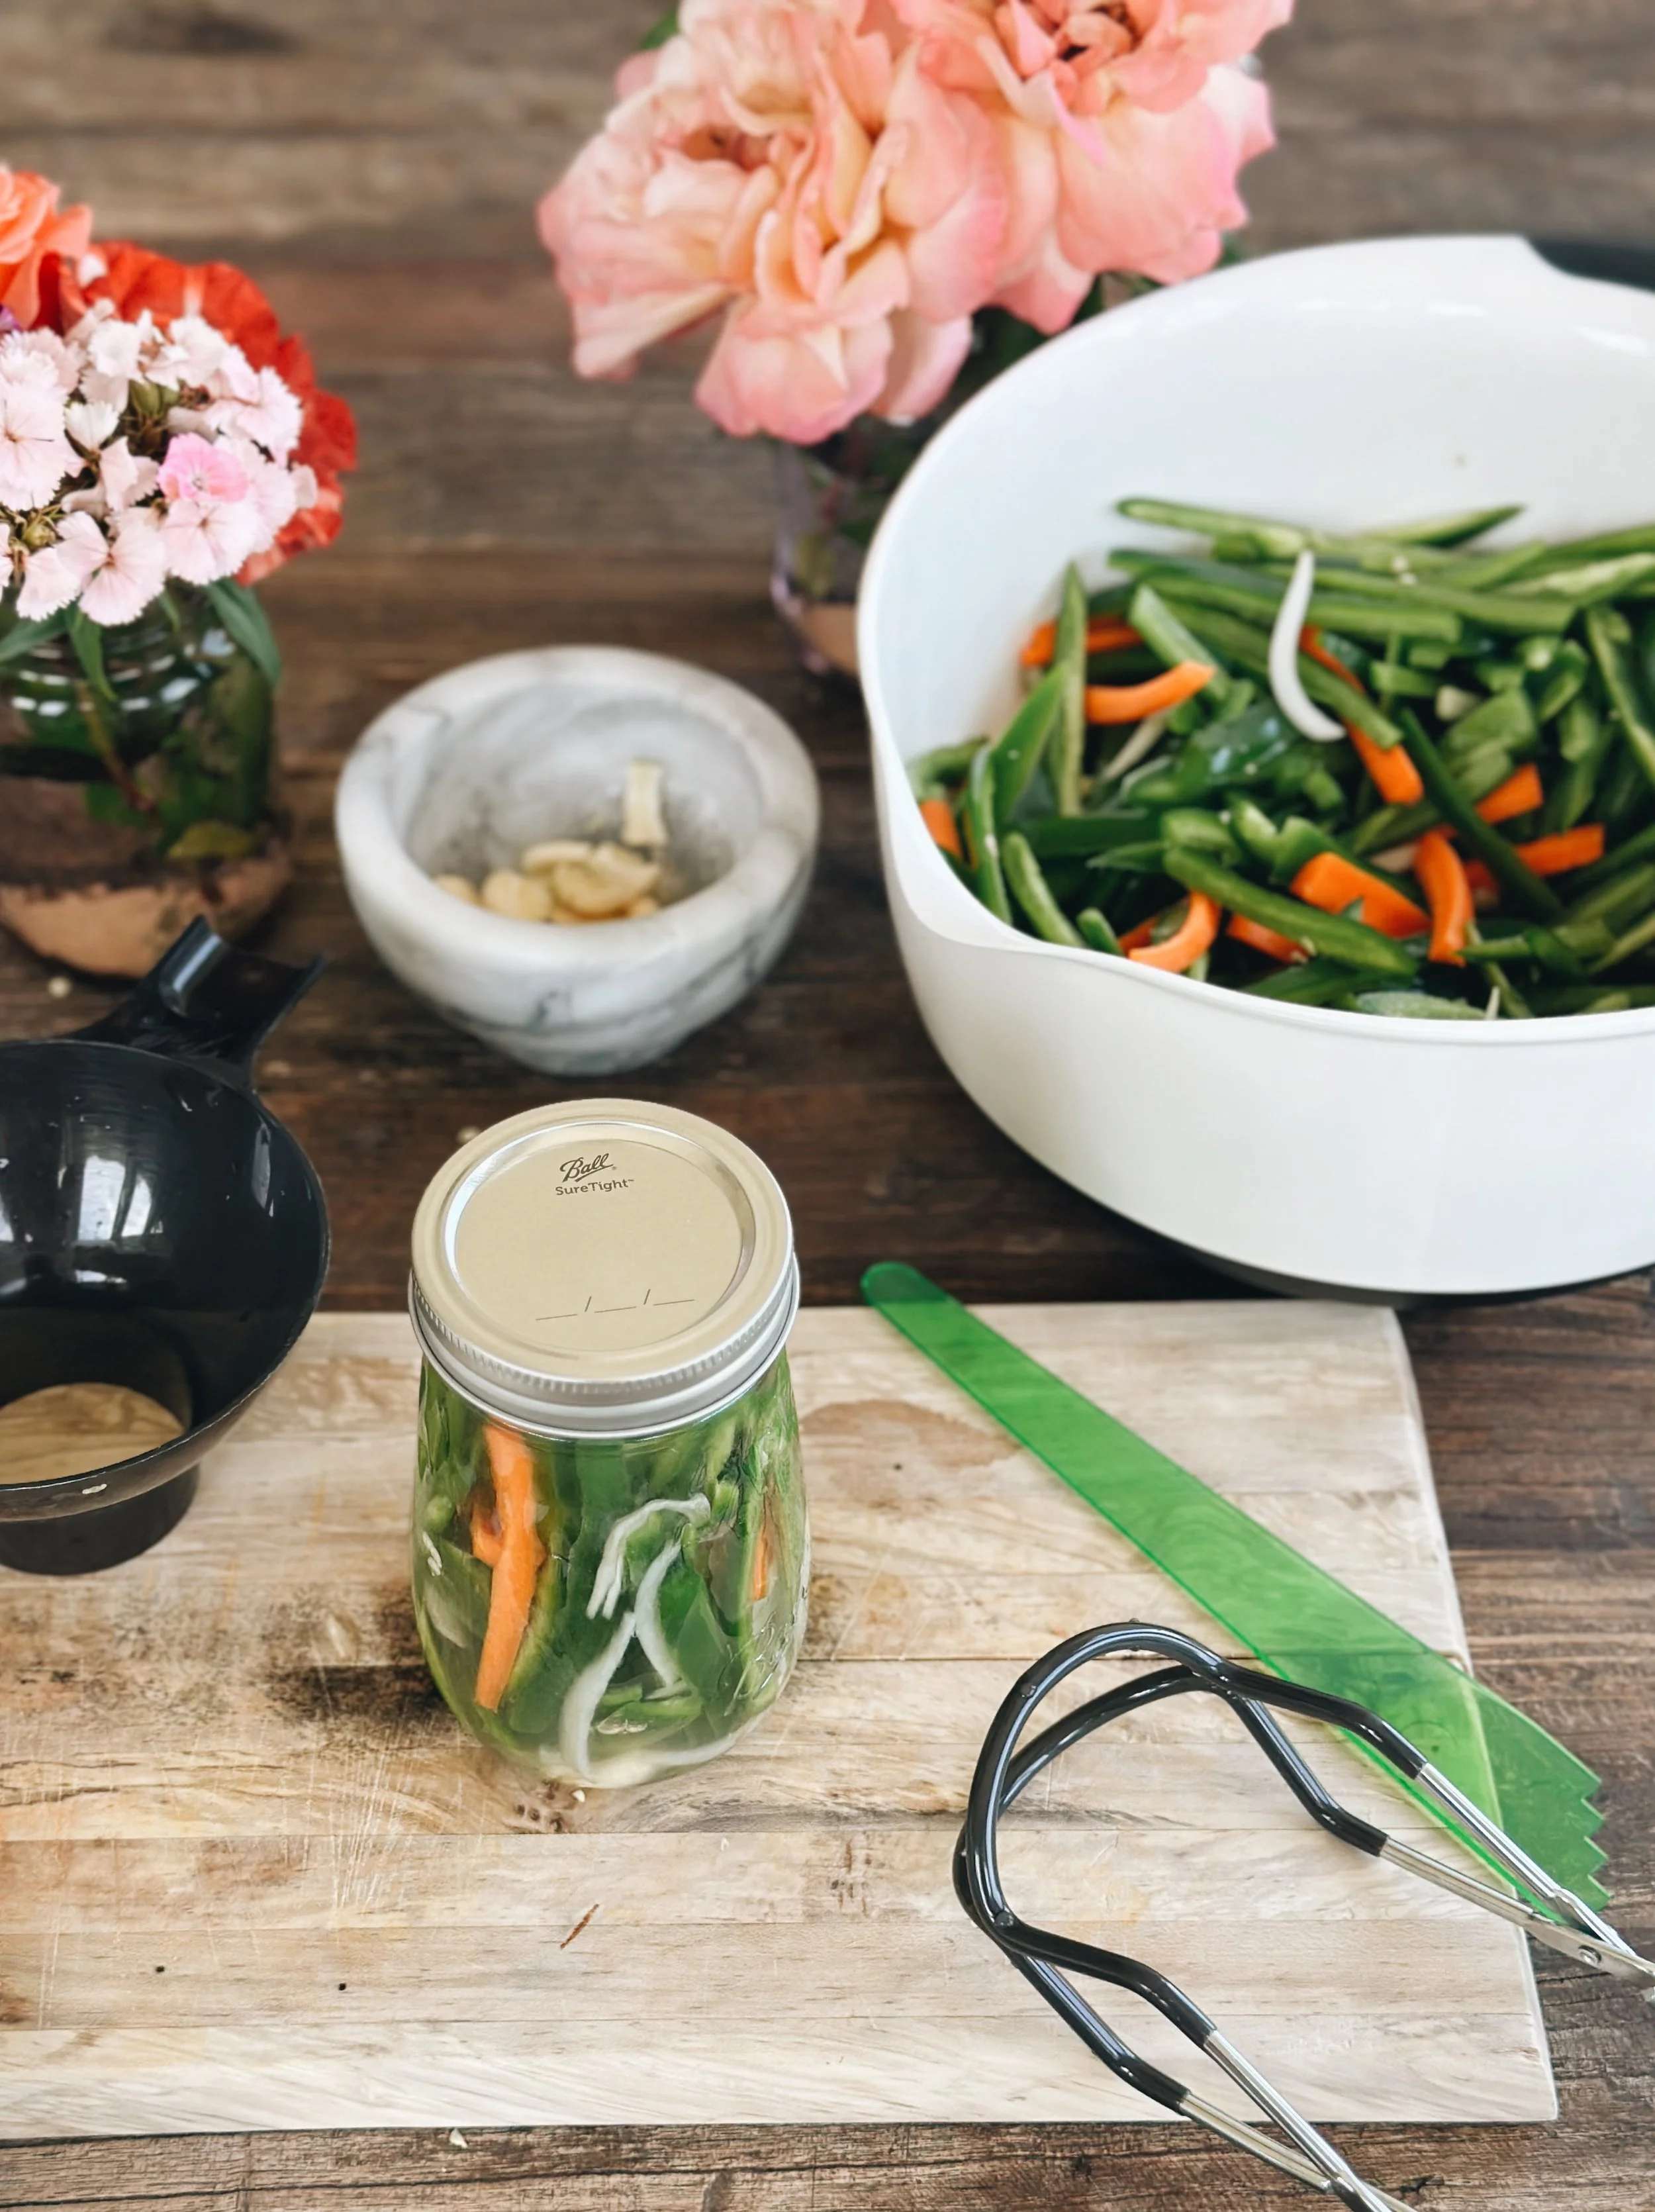
3 1/2 lb. (1.6 kg) jalapeño peppers, seeded and quartered
1 cup (250 mL) thinly sliced white onion
2 large carrots, thinly sliced
2 1/2 cups (625 mL) white vinegar (5% acidity)
2 1/2 cups (625 mL) water
2 Tbsp. (30 mL) Ball® Salt for Pickling & Preserving
1 Tbsp. (15 mL) sugar
6 garlic cloves, crushed
Ball® Pickle Crisp (optional)
directions
STEP 1
Fill your water bath canner with enough water to cover jars by 1-2 inches and bring to a simmer. Keep your jars in hot water (not boiling) until you are ready to add the food content. Wash lids and bands in warm soapy water and set aside.
step 2
Put on gloves, and cut peppers in half lengthwise; remove seeds. Cut the halves in half lengthwise to create long strips. Place jalapeño strips in a large bowl. Add onion and carrot; toss well.
step 3
Combine vinegar, water, salt for pickling & preserving, and sugar in a large stainless steel or enameled saucepan. Bring to a boil.
Step 4
Place 1 crushed garlic clove in a hot jar, and pack the jar tightly with vegetable mixture, leaving 1⁄2-inch headspace. Add 1⁄8 tsp. Ball® Pickle Crisp to the jar, if desired. Ladle hot pickling liquid over vegetables, leaving 1⁄2-inch headspace.
Step 5
Remove any air bubbles with the bubble remover or a rubber spatula by sliding the tool down the side of the jar, then pulling inwards. Rotate and repeat around the jar as needed until all bubbles are removed. Repeat this two to three times.
STEP 6
Wipe the rim and threads using a damp cloth to remove any food residue. Place the lid on and screw the band on until it is fingertip-tight.
Using your jar lifter, place the jar upright into the water and onto the rack. Your jars should be covered with 1-2 inches of water; if not, add more water. Repeat steps 4 - 6 for each jar one at a time until all your filled jars have been placed into the canner.
STEP 7
Turn the heat up, and wait until you hear or see the water vigorously boiling (rolling boil). The processing time of a recipe only starts when the water has reached boiling point. Start your timer and process the jars for 10 minutes, adjusting for altitude.
STEP 8
When the processing time is completed, turn off your burner. Remove the pot's lid away from you (be careful of the steam!), and wait 5 minutes before taking your jars out. This helps for a better vacuum seal.
STEP 9
Carefully remove the jars, one at a time, with the jar lifter. Keep them upright, and place your jars on a towel or wood cutting board. Never place them directly onto a cold surface or countertop to prevent cracking due to thermal shock.
Leave the jars untouched for 12-24 hours. Do not tamper with the lids or bands or wipe away water ;-)
After 12-24 hours, check if the lids have been sealed. Press the center - A properly sealed jar lid will not spring up when you press down in the center. Remove the band and use a finger to press down on the middle of the lid. If the lid springs up when you lift your finger, the jar must be reprocessed before you can store it safely.
Can I use any peppers?
A variety of peppers can be used to make home-canned pickled peppers. Common varieties are Cubanelle, Hungarian, yellow wax, sweet cherry, sweet banana, and sweet bells. Thick-fleshed peppers with firm waxy skins and a bright, glossy color, free from defects, give the best-pickled products.
Avoid peppers that are soft, shriveled, and dull or faded in color. To guarantee the most delicious preserved foods, always begin with the best-quality produce at its peak of ripeness. The shortest time from picking to canning offers the highest quality pickled product.

print this recipe

Home-Style Pickled Jalapeños
Ingredients:
3 1/2 lb. (1.6 kg) jalapeño peppers, seeded and quartered
1 cup (250 mL) thinly sliced white onion
2 large carrots, thinly sliced
2 1/2 cups (625 mL) white vinegar (5% acidity)
2 1/2 cups (625 mL) water
2 Tbsp. (30 mL) Ball® Salt for Pickling & Preserving
1 Tbsp. (15 mL) sugar
6 garlic cloves, crushed
Ball® Pickle Crisp (optional)
Directions:
STEP 1
Fill your water bath canner with enough water to cover jars by 1-2 inches and bring to a simmer. Keep your jars in hot water (not boiling) until you are ready to add the food content. Wash lids and bands in warm soapy water and set aside.
step 2
Put on gloves, and cut peppers in half lengthwise; remove seeds. Cut the halves in half lengthwise to create long strips. Place jalapeño strips in a large bowl. Add onion and carrot; toss well.
step 3
Combine vinegar, water, salt for pickling & preserving, and sugar in a large stainless steel or enameled saucepan. Bring to a boil.
Step 4
Place 1 crushed garlic clove in a hot jar, and pack the jar tightly with vegetable mixture, leaving 1⁄2-inch headspace. Add 1⁄8 tsp. Ball® Pickle Crisp to the jar, if desired. Ladle hot pickling liquid over vegetables, leaving 1⁄2-inch headspace.
Step 5
Remove any air bubbles with the bubble remover or a rubber spatula by sliding the tool down the side of the jar, then pulling inwards. Rotate and repeat around the jar as needed until all bubbles are removed. Repeat this two to three times.
STEP 6
Wipe the rim and threads using a damp cloth to remove any food residue. Place the lid on and screw the band on until it is fingertip-tight.
Using your jar lifter, place the jar upright into the water and onto the rack. Your jars should be covered with 1-2 inches of water; if not, add more water. Repeat steps 4 - 6 for each jar one at a time until all your filled jars have been placed into the canner.
STEP 7
Turn the heat up, and wait until you hear or see the water vigorously boiling (rolling boil). The processing time of a recipe only starts when the water has reached boiling point. Start your timer and process the jars for 10 minutes, adjusting for altitude.
STEP 8
When the processing time is completed, turn off your burner. Remove the pot's lid away from you (be careful of the steam!), and wait 5 minutes before taking your jars out. This helps for a better vacuum seal.
STEP 9
Carefully remove the jars, one at a time, with the jar lifter. Keep them upright, and place your jars on a towel or wood cutting board. Never place them directly onto a cold surface or countertop to prevent cracking due to thermal shock. Leave the jars untouched for 12-24 hours. Do not tamper with the lids or bands or wipe away water ;-)
After 12-24 hours, check if the lids have been sealed. Press the center - A properly sealed jar lid will not spring up when you press down in the center. Remove the band and use a finger to press down on the middle of the lid. If the lid springs up when you lift your finger, the jar must be reprocessed before you can store it safely.
Try this super tasty recipe for your next picnic or cookout, I promise it won’t disappoint! Always remember to follow the exact steps and approved recipes (like this one) for a desirable, safe end product!
Have a look at these other delicious picnic and cookout options:
I hope this gives you some ideas for your next gathering!
PIN FOR LATER
Still unsure about this whole canning thing and process?
Do you still have canning fears and questions?
Want to learn all there is on how to can food and become a canning expert?
Then you might want to get my CANNING COURSE in partnership with Ball® home canning!